Step 1: Make a List of Classes You Want to Wait List
Write down the CRN for each class you want to wait list. You can find the CRN’s in the current Río Hondo College Class Schedule.
Step 2: Log Into Your AccessRío Account
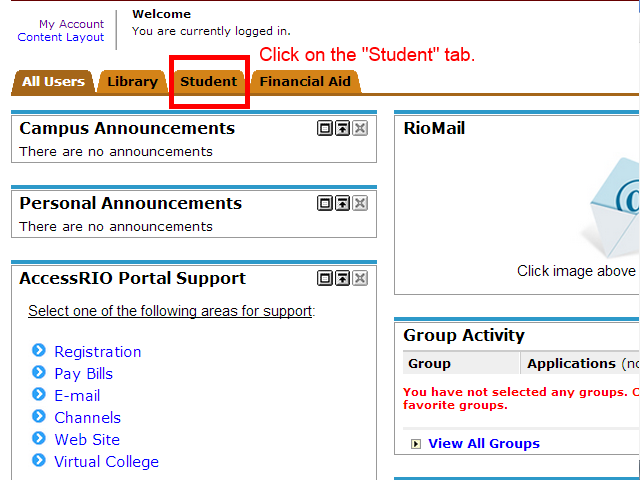
Step 3: Click on the “Student” Tab
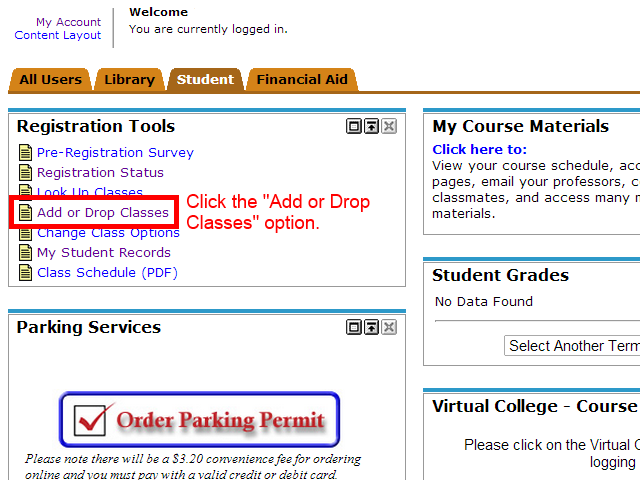
Step 4: Click the “Add or Drop Classes” Option
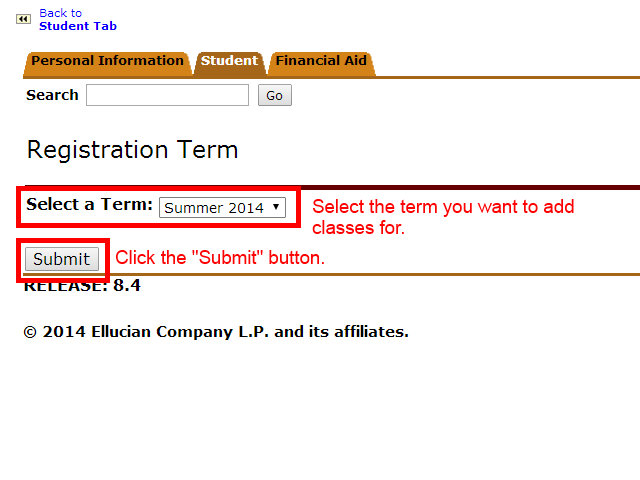
Step 5: Select the Term You Want to Add Classes for and Then Click the “Submit” Button
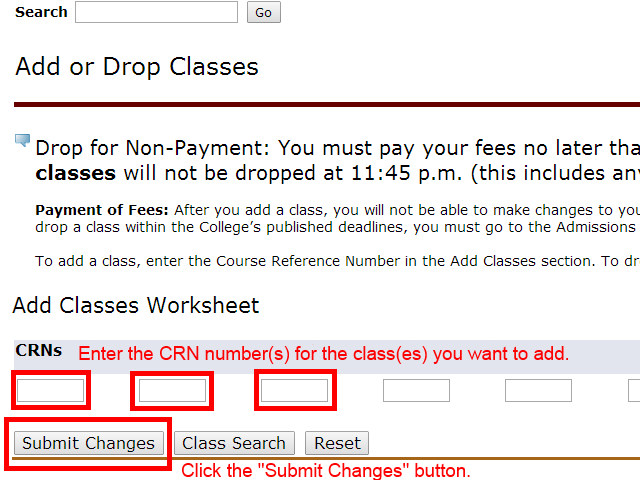
Step 6: Enter the CRN for the Class(es) You Want to Waitlist and Then Click the “Submit” Button
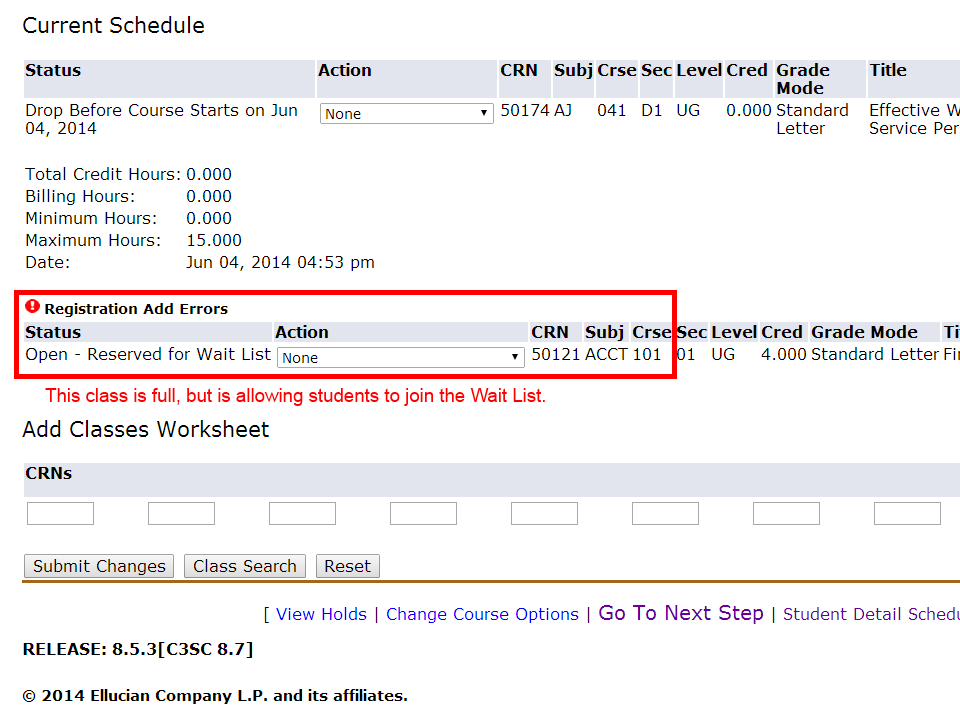
Step 7: If the Class Is Full but Accepting Students on the Wait List, You Will See the “Registration Add Errors” Dialogue Box
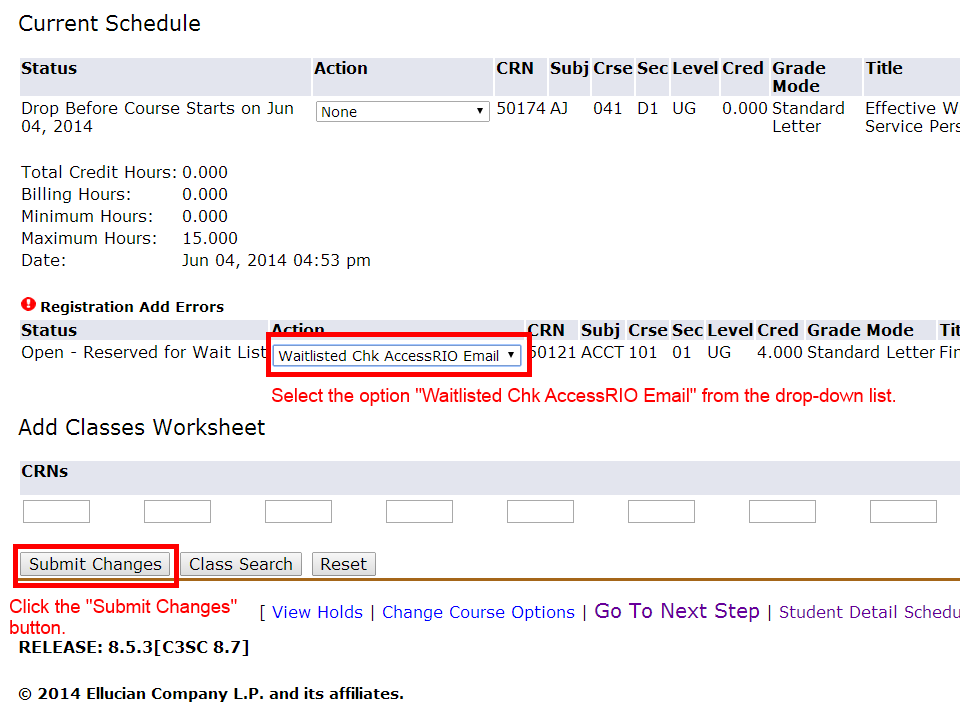
Step 8: Select the Option “Waitlisted Chk AccessRío Email” from the Drop-down List and Click the “Submit Changes” Button
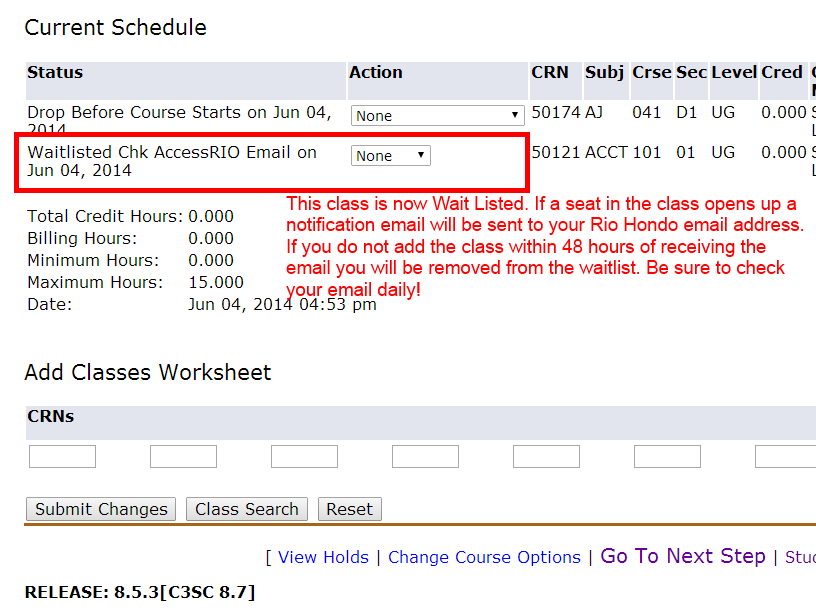
Step 9: Verify That You Have Been Placed on the Wait List
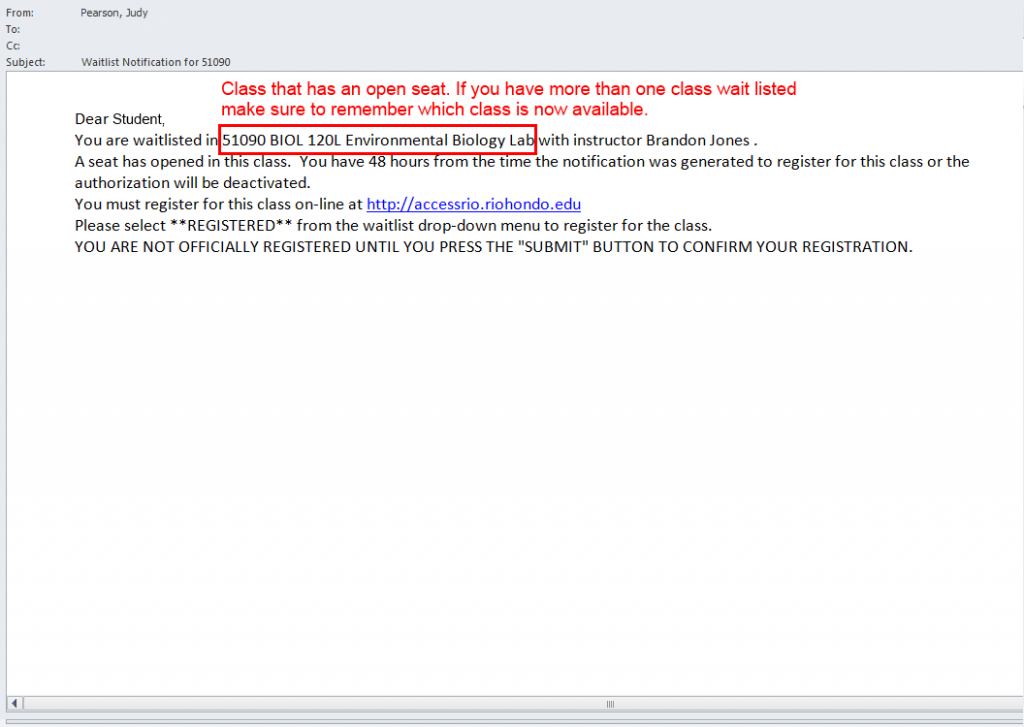
Step 10: Check Your Río Hondo College Email Account Every Day
If a seat opens up you will receive a notification like the one below. You have 48 hours to add the class. If you do not add the class before the 48 hours is up you will be automatically removed from the wait list.
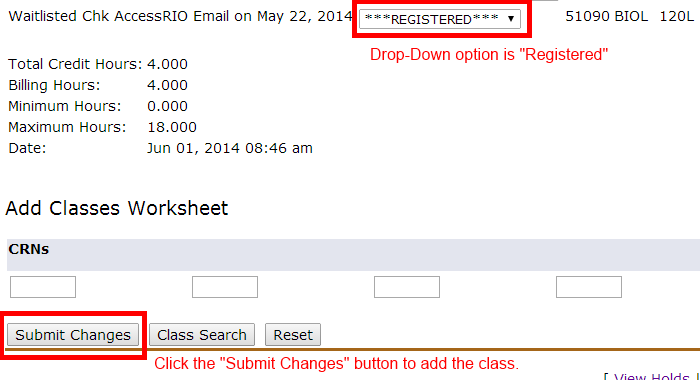
Step 11: Select the “Registered” Option from the Drop-down List

Step 12: Make Sure the “Registered” Option Is Selected and Click the “Submit Changes” Button
Step 13: Verify That the Class Has Been Successfully Registered

Step 14: Save a Copy for Your Records – You Are Finished Adding Your Class(es)
Just in case there is a problem later on it is good to retain a record that you did add the class. You can print the screen, save a copy of the page on your computer or take a picture with your phone.